Wednesday, December 24, 2008

Rib Nose


I made the first nose piece using my disk grinder then used it as a patter to make the other 4 using my router. I just screwed them together. I know that there is only 3 in the pic but the other is in the jig.


This is my plan of action on the full length ribs. Instead of cutting them short and then later adding a piece to round out the rib, I am going to make the rounded lead edge right into the rib. This should make things a little easier(????) and stronger for sure. It will allow the tip wood insert to be sandwiched in between the plywood skins. This plywood that I am using for this part is a 9 ply birch with no voids. Earlier I tried to soak it and get it to delaminate. It would not come apart at all. This might be a hint heavier than the plans version, but not enough to ever notice.
Posted by Picasa

Tuesday, December 23, 2008

Christmas Ribs


Here is a pic of one of my fourteen finished ribs. I used a trim bit in a router to cut the excess material off the gussets to make the edges match the top and bottom cap strips. Later I want to use a 45 deg bit so that I can bevel the edges away of the gussets so that they will not show when the wing is covered.


I thought that this was a pretty cool pic. The whole time I was making the ribs I was worried that they would not match very good. I was wrong. They look pretty good. I hope Dad is surprised.
Posted by Picasa

Saturday, December 20, 2008

2nd Fuse Sid Out of Jig

Finally the second fuse side is tacked and out of the jig. This is probably one of the coolest days in the build process to date. Lots of excitement. Dad and I passed the torch back and forth across the jig to get all the joints tacked.
ATTENTION
Those of you that are using MDF board for a table top, Don't spend much time between fuse sides. We laid the jig out about a year ago and built the first side probably 9 months ago. When we got ready to tack the 2ND side we laid the first side over the second and it did not mach up very well. There was probably 1/4" difference from firewall to tail post. Our fix was to put the first side back in the jig and redo the blocks. After we did this everything went pretty smooth and the second side came out like the first. I guess the MDF expanded due to moisture. Pics to come.

Friday, December 12, 2008

Christmas is coming

Well I have the 14 short ribs out of the jig. I am currently in the process of putting gussets on the front and back. I am getting ready to make the 4 full size ribs. I hope to get all this done by X-mas.
I have also been practicing my welding. Its getting a lot better. The joints don't look awesome but they do hold up to the destruction test. If I can't get Dad in the shop, I am going to have to take this bull by the horns. More fun for me I guess.

Monday, November 24, 2008

10 Ribs Done


Not really much to show lately. Just more of the same ribs over and over. I am getting better at making the joints. Soon I will be on to making the 4 full size ribs with full mahogany plywood skins.
Posted by Picasa

Friday, November 7, 2008

First Rib


First good rib off the jig.

Obviously at this point I have only glued one side of the rib gussets.

At the front of this rib I put triangular gussets per the plans. After looking some things over I decided to replace these gussets with a single rectangular gusset that spans top to bottom just like the rest of the gussets that go up against the spar openings.


I went ahead and epoxied the back side of the gussets so that later on the varnishing will not be as hard. The solid blocking for the aileron spar attach and the nose block are made out of Douglas Fir. I oriented the grain on the rear block so that it will not split as easily when i screw the spar to it.

Posted by Picasa

Thursday, November 6, 2008

Gusset Stapler

I have been making ribs the last few days and have tried a few different ways of clamping the gussets while they dry. This method is not working for me so I am going to use the old fashion method, staples. Didn't have a gun so I bought this on for $10.99 at sears. I tried it on a piece of scrap gusset material and it worked great. I thought it would splinter the plywood. I was wrong. At the moment I can do about a rib a day. That's good enough for me.
Posted by Picasa

Sunday, November 2, 2008

Rib Diagonals


Today I cut all the diagonals for the ribs to length. I will later cut the mitres with my combo belt disk sander. I have a mitre saw but I like to use the disk sander better. It lets me fine tune each piece better. I made a first rib but after pulling it out of the jig and gluing the gussets on I have decided that this will be a practice rib. I think I can do better on the next 20. We shall see. This is not a big deal because I think I have enough capstrips.
Posted by Picasa

Monday, October 20, 2008

Cap Strip Steamer


Here is my little invention for steaming the cap strips for my ribs. Its mostly made of 3" PVC pipe. The idea is to boil the water in the coffee pot until the steam goes up through the 1 1/2" pipe. The end that you are looking through has a screw on cap. The pieces of wire in the 3" pipe are to suspend the cap strips so the steam can engulf them. I have tested it out to see if it will make steam but have not used it on the wood yet.

After trying this method I didn't like it. I am now soaking the cap strips over night. This works pretty good.
Posted by Picasa

Rib Wood $$$


Here is the wood for the 20 ribs I will be building. 1/2 x 1/4 spruce and 1/16" mahogany plywood. About $275 worth + shipping. I ordered the cap strips in 4' lengths and the plywood in 2' x 4' pieces.
Posted by Picasa

Thursday, August 14, 2008

Practice Welding


Looks like I have a long way to go. Welding is not as easy as it looks, but is pretty fun. Dad will probably tack the first side of the fuse and maybe I will have practice enough to tack the back.
Posted by Picasa

Friday, July 25, 2008

Meco Midget Torch


We started in on tac welding the fuse frame side and ran into problems with our torch. It was doing a lot of popping. This gave me an excuse for buying this neat little torch from TM Tech. I bought the kit that came with the video of Earl & Kent White welding a 4130 fuse and parts. I have watched about half of the video so far. It has some good info. I would recomend it.
Posted by Picasa

Sunday, May 18, 2008

Front spar opening

Posted by Picasa
If you look at the front spar plug you will see that this will not work. There is no room for glue in the joint. I figured this out as I was putting the test rib together. I will later remove some material in the corners so that the rib will not glue itself to the jig.
Posted by Picasa

Flap & Aileron Spar

Posted by Picasa

Starting of a Rib Jig

Posted by Picasa
Posted by Picasa

What is this!

This will be part of the jig. Since the hole is of center it works like a cam lock. I will screw these down close to the center line and then just rotate it until an edge is on the line. You will see.
Posted by Picasa
Posted by Picasa

Ribs

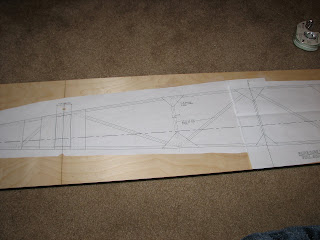
I had a board made with a center line down the middle for laying out the wing rib jig. At first I thought that the center line dims for the spars were 31" apart. This is not the case on my template. It is more like 30 3/16". The reason why I am doing this jig instead of finishing the fuse side is so I can make sure my spars will be in the right place for there fittings. The fuse side dims do not add up right so I am doing some double checking. Anyway it is something I will not have to do later and I can do this part at my house.
Posted by Picasa