Sunday, February 8, 2009

Spar joint fittings


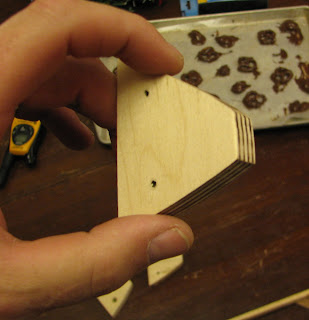
More pics of the front cabin spar.
Posted by Picasa

Saturday, January 10, 2009

Front spar carry through


This looks better in person. We have made this piece twice. The first time we made it come to the center of the longerons. According to the plans it is supposed to come out flush with the outside of the longerons.
Posted by Picasa

Welding away


Here I am tacking the lower rear crossmember.


This is what we got at the end of the day. So far we are real happy with how square it is. We use a scrap piece of pipe to complete the box where the rear spar carry through will be. According to Earl you should sit in your frame and make airplane noises before anything is finalized on the cabin. I am a tall guy (6'4") so we will be moving the seat back 3" or so. The girls were real good today.
Posted by Picasa

Making a box


Todays job was to get all the cross members in the cabin area. We are making the big boy version (42").
Posted by Picasa

Broken TV


Today we worked on the fuse again. It was a cold day. I needed to have my kids with me so I dressed the real warm and set them up some movies in the hangar. If you look you will see that the TV plastic is all destroyed. My mother-in-law gave me this TV because the plastic started to crack off of it. Now there is no plastic left on it but it gets great reception with a piece of safety wire for an antenna. I had an old DVD player that I hooked up to it. Worked great. Note the speakers.
Posted by Picasa

Sunday, January 4, 2009

Full Size Rib


Here is how I did my full size ribs. I will use this rib as a template for the leading edge as well as for the rest of the full ribs. My trim bit in my router should make quick work of the rest of the full size ribs.
Posted by Picasa

Wednesday, December 24, 2008

Rib Nose


I made the first nose piece using my disk grinder then used it as a patter to make the other 4 using my router. I just screwed them together. I know that there is only 3 in the pic but the other is in the jig.


This is my plan of action on the full length ribs. Instead of cutting them short and then later adding a piece to round out the rib, I am going to make the rounded lead edge right into the rib. This should make things a little easier(????) and stronger for sure. It will allow the tip wood insert to be sandwiched in between the plywood skins. This plywood that I am using for this part is a 9 ply birch with no voids. Earlier I tried to soak it and get it to delaminate. It would not come apart at all. This might be a hint heavier than the plans version, but not enough to ever notice.
Posted by Picasa